Object Arrangement
Besides adding objects with a specific transformation or using the Anchor-based Compositioning described previously, we can also randomly place objects on a surface or inside a volume as described next.
Support Surfaces
Before placing objects in a scene, support surfaces need to be defined on the existing scene content with the label_support function.
These support surfaces are 2D polygons where objects could be placed in and are indentified by their label.
from scene_synthesizer import procedural_scenes as ps
import numpy as np
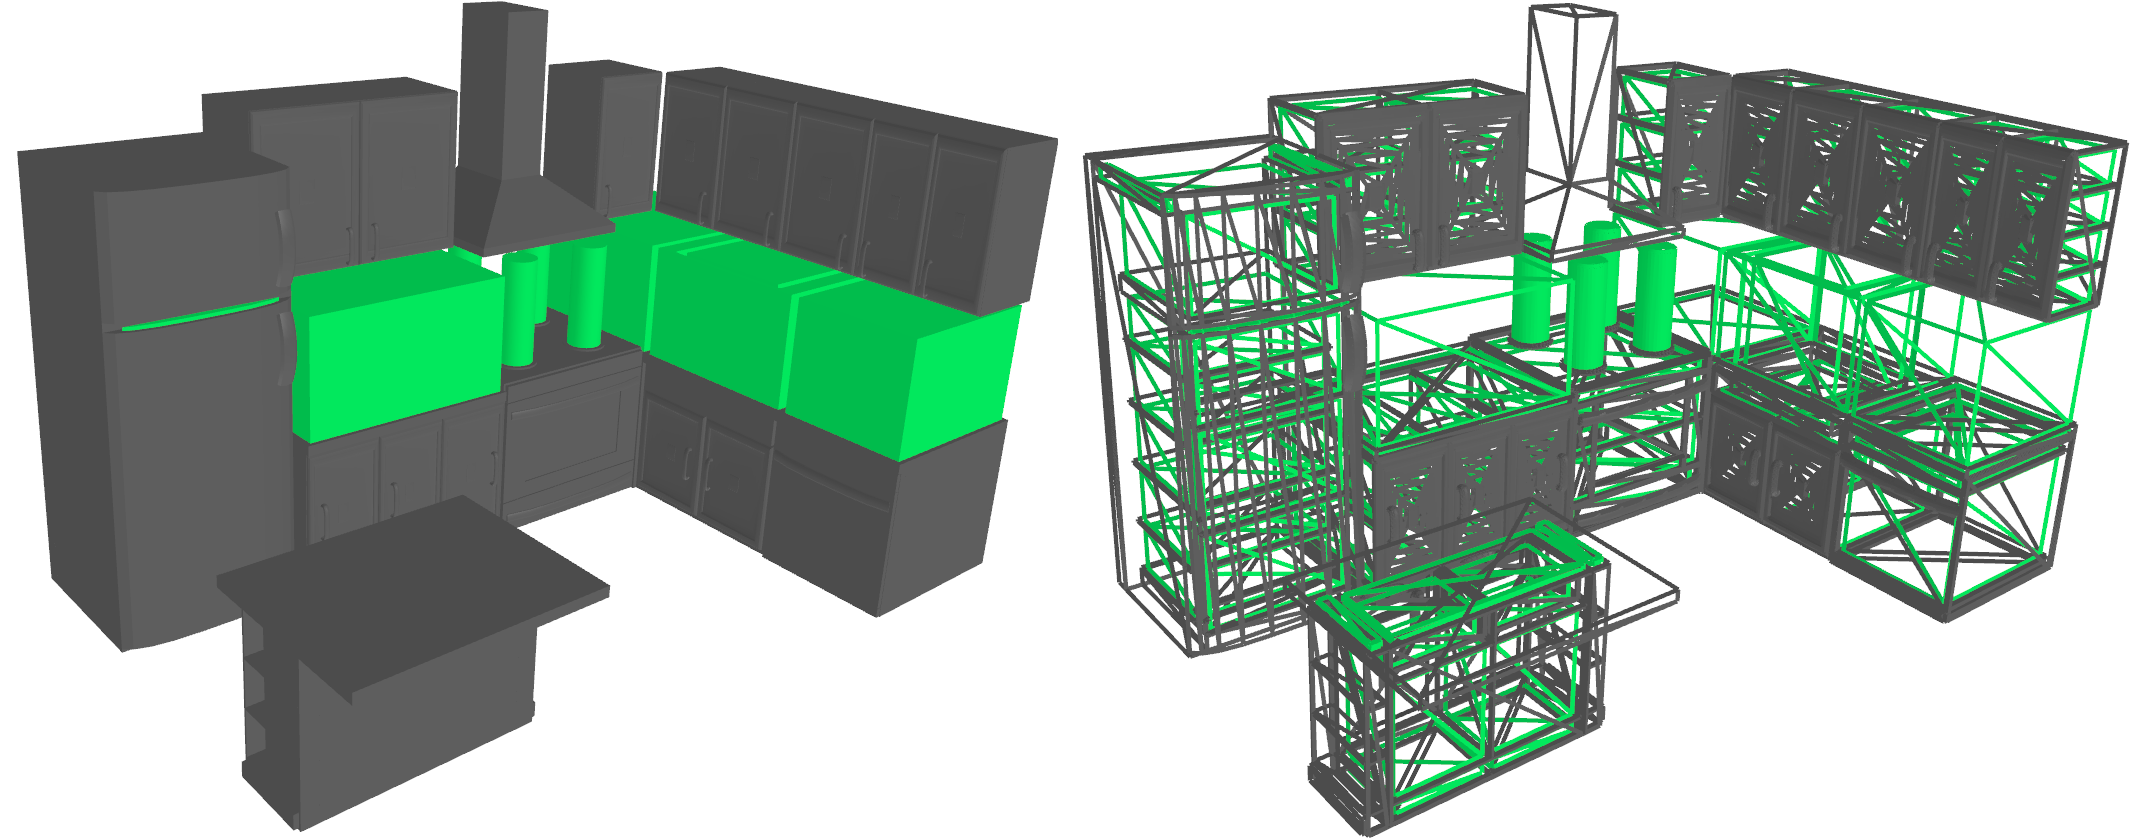
kitchen = ps.kitchen_island()
kitchen.label_support(
label="support",
min_area=0.05,
gravity=np.array([0, 0, -1]),
)
kitchen.show_supports()

In this example, surfaces were also found inside the hanging cabinets and refrigerator as shown in the wireframe view.
The label_support has a number of arguments that allow the user to filter surfaces for properties such as area, position, orientation, etc.
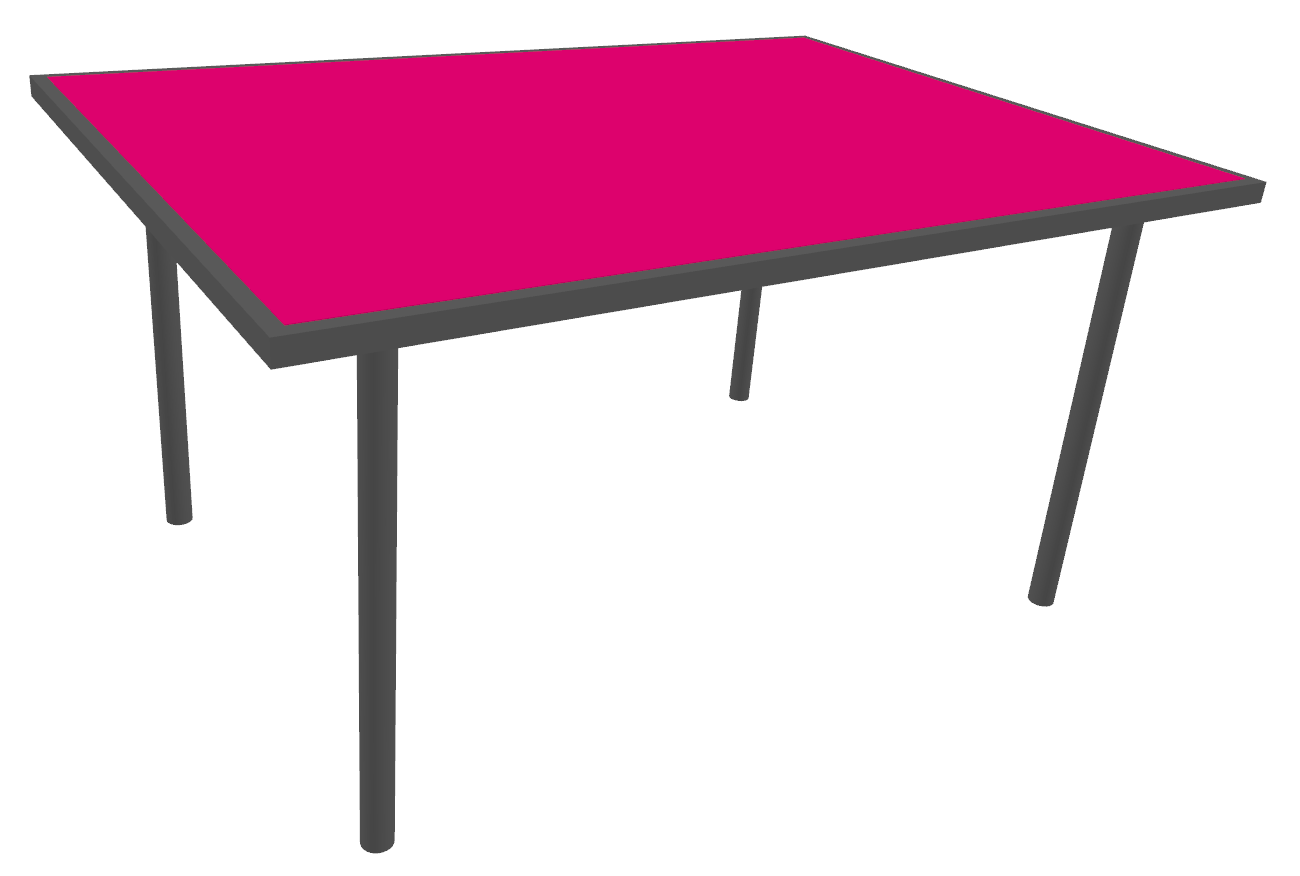
Let’s continue with a simpler example that only includes a single surface on a table:
from scene_synthesizer import procedural_assets as pa

table_scene = pa.TableAsset(1.0, 1.4, 0.7).scene('table')
table_scene.label_support(label="support")

table_scene.show_supports()
Object Placement
Once the support surface has been defined, objects can be placed on them with the place_object method:
mug = pa.MugAsset(
    # this is needed since the place_object method
    # will only sample a point on the surface
    origin=("com", "com", "bottom"),
)

table_scene.place_object(
    obj_id="mug",
    obj_asset=mug,
    support_id="support",  # this is a reference to
    # a surface that was labelled via label_support
)
table_scene.colorize()
table_scene.show()
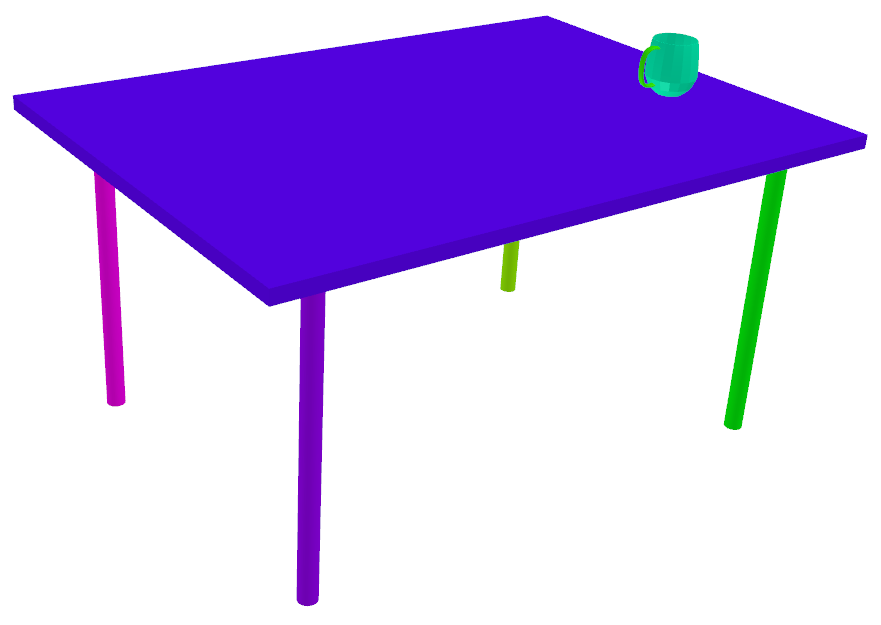
The place_object method uses rejection sampling to find a collision-free pose.
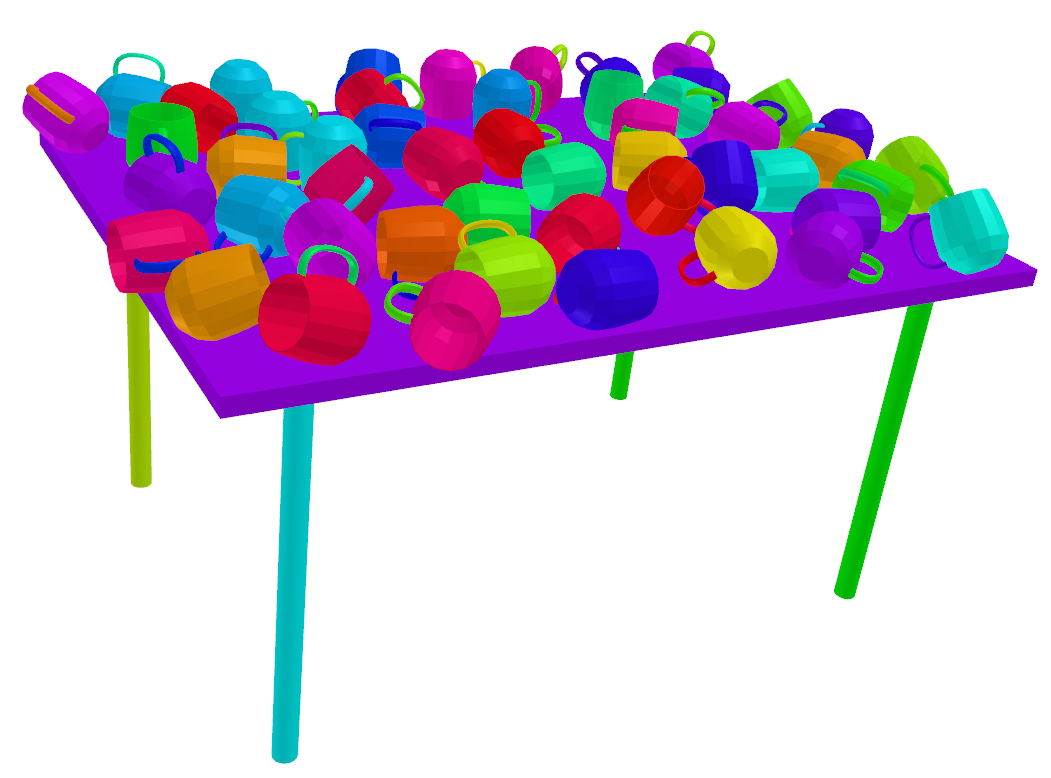
This can be easily extended to multiple objects:
for i in range(50):
    table_scene.place_object(
        obj_id=f"mug{i}",
        obj_asset=mug,
        support_id="support",
    )

table_scene.colorize()
table_scene.show()
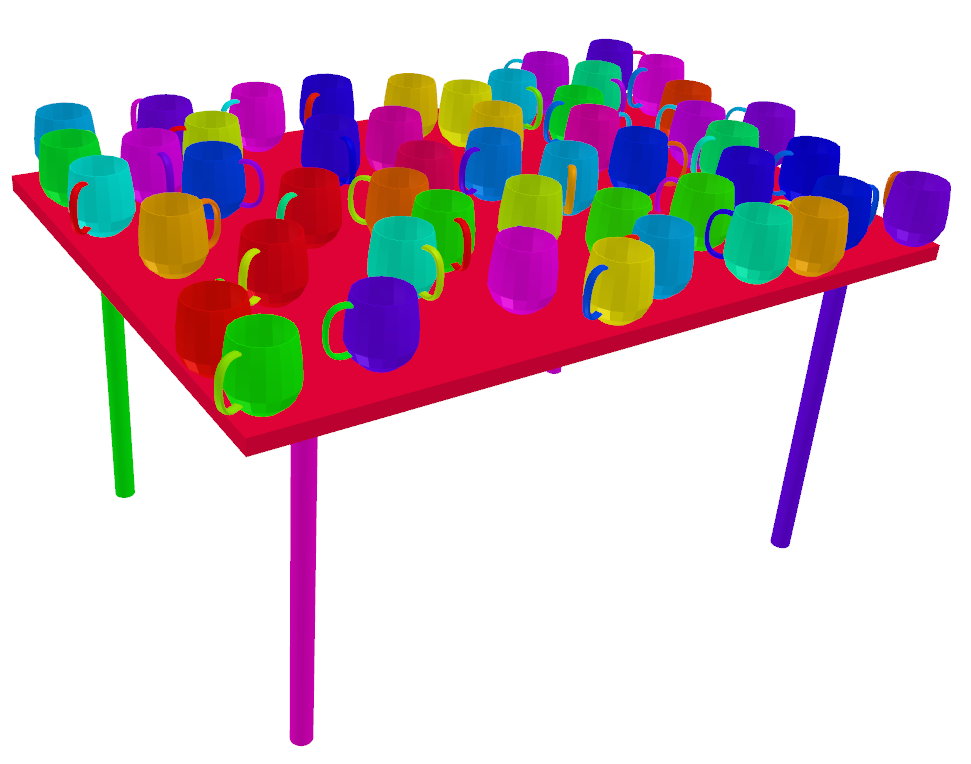
Note, that the mugs in this example only vary in their rotation around the Z-axis.
This is because the default parameter for obj_orientation_iterator = utils.orientation_generator_uniform_around_z.
We can also use random stable orientations:
from scene_synthesizer import utils

# remove all mugs with a regular expression
# that captures all object names
table_scene.remove_object('mug.*')

for i in range(50):
    table_scene.place_object(
        obj_id=f"mug{i}",
        obj_asset=mug,
        support_id="support",
        obj_orientation_iterator=utils.orientation_generator_stable_poses(mug),
    )

table_scene.colorize()
table_scene.show()
Placement Distributions
In the previous examples all placements were uniformly distributed on the support surfaces.
There are more distributions available in the utils module.
Here, we show them by repeatedly placing mugs on a table:
import scene_synthesizer as synth
from scene_synthesizer import utils
from scene_synthesizer import procedural_assets as pa

import trimesh.transformations as tra

obj_position_iterator = [
    utils.PositionIteratorUniform(),
    utils.PositionIteratorGaussian(params=[0, 0, 0.08, 0.08]),
    utils.PositionIteratorPoissonDisk(k=30, r=0.1),
    utils.PositionIteratorGrid(step_x=0.02, step_y=0.02, noise_std_x=0.04, noise_std_y=0.04),
    utils.PositionIteratorGrid(step_x=0.2, step_y=0.02, noise_std_x=0.0, noise_std_y=0.0),
    utils.PositionIteratorFarthestPoint(sample_count=1000),
]

mug = pa.MugAsset(origin=('com', 'com', 'bottom'))
table = pa.TableAsset(1.0, 1.4, 0.7)

s = synth.Scene()

cnt = 0
for x in range(3):
    for y in range(2):
        s.add_object(table, f'table{cnt}', transform=tra.translation_matrix((x * 1.5, y * 1.5, 0.0)))
        s.label_support(f'support{cnt}', obj_ids=[f'table{cnt}'])
        s.place_objects(
            obj_id_iterator=utils.object_id_generator(f"Mug{cnt}_"),
            obj_asset_iterator=(mug for _ in range(20)),
            obj_support_id_iterator=s.support_generator(f'support{cnt}'),
            obj_position_iterator=obj_position_iterator[cnt],
            obj_orientation_iterator=utils.orientation_generator_uniform_around_z(),
        )
        cnt += 1

s.colorize()
s.colorize(specific_objects={f'table{i}': [123, 123, 123] for i in range(6)})
s.show()
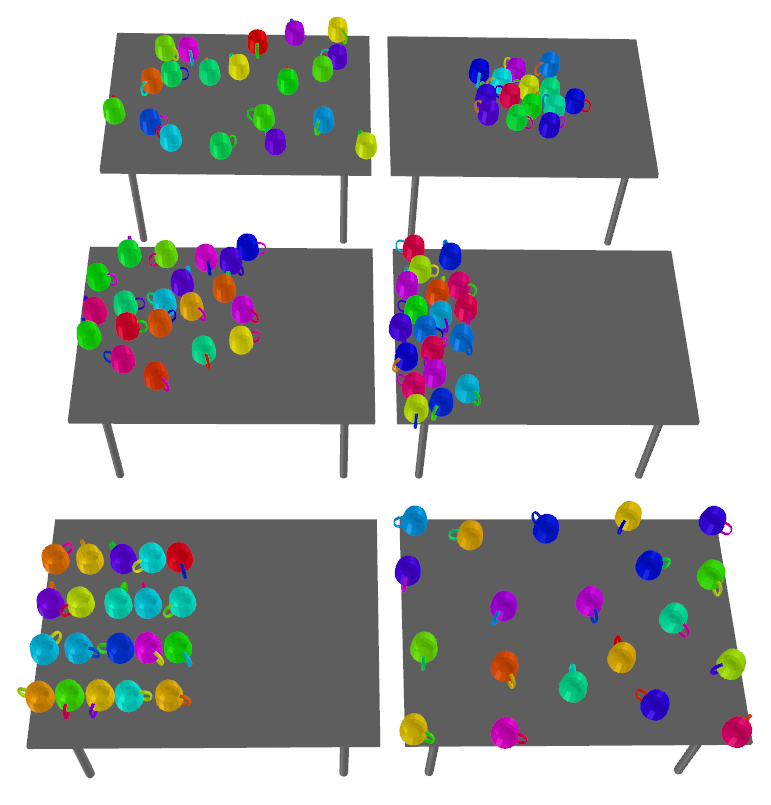
Note, that you can also provide your own custom distribution.
Containment Volumes
The 3D counterpart to support surfaces are containments.
They can be used for sampling placements in 3D.
Labelling them in a scene can be done via the label_containment method:
from scene_synthesizer import procedural_scenes as ps

kitchen = ps.kitchen_island()
kitchen.label_containment(
    label="containers",
)

kitchen.show_containers()
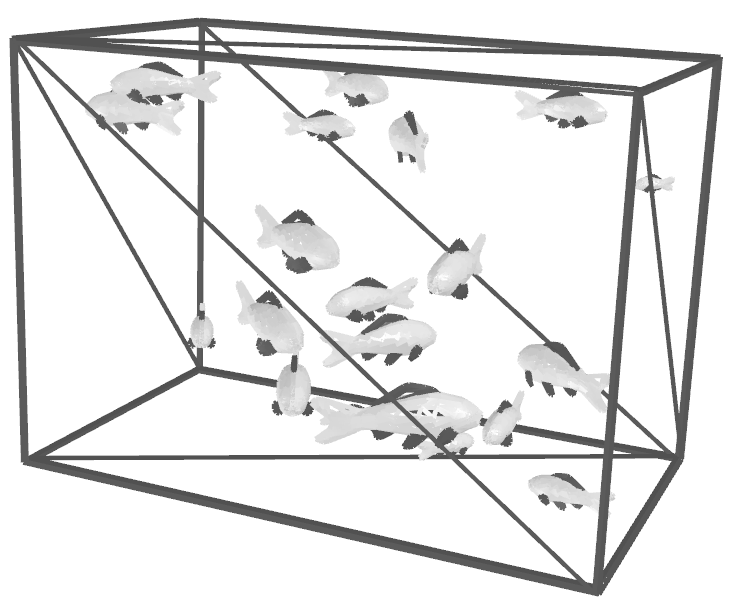
Internally, the method searches for support surfaces and extrudes them until a collision occurs. In the following example we label the interior volume of a container asset and use it to sample random placements for other assets:
import scene_synthesizer as synth
from scene_synthesizer import utils
from scene_synthesizer import procedural_assets as pa

aquarium = pa.OpenBoxAsset(0.7, 0.4, 0.5, thickness=0.005, angle=0, front_scale=1)

s = synth.Scene()
s.add_object(aquarium, 'aquarium')
s.label_containment('water')

s.place_objects(
    obj_id_iterator=utils.object_id_generator(f"fish_"),
    # Note, that you'll need to replace <fish.obj> with the path
    # to a mesh that you need to provide
    obj_asset_iterator=(synth.Asset('<fish.obj>', up=(0, 1, 0), width=w)
        for w in np.random.uniform(0.04, 0.20, size=20)),
    obj_support_id_iterator=s.container_generator('water'),
    obj_position_iterator = utils.PositionIteratorUniform3D(),
    obj_orientation_iterator=utils.orientation_generator_uniform_around_z(),
)
s.show()